
How to Plan Camera Coverage for Your Property
[yasr_overall_rating]
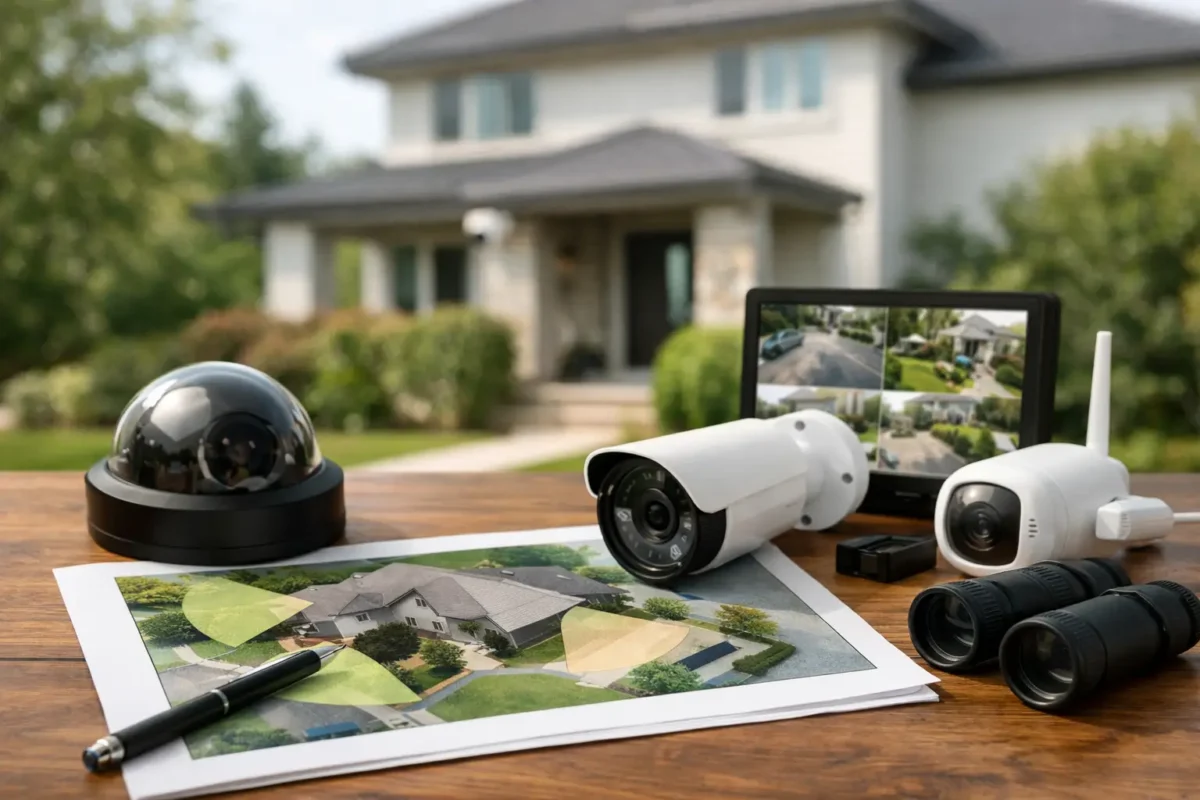
A camera mounted in the wrong location can create a false sense of security. It may show that someone entered your property, but fail to capture a usable face, a license plate, or the event that led to a loss. Knowing how to plan camera coverage means designing for real security questions before selecting hardware: What needs protection? Who enters? Where can an incident occur? What evidence would you need afterward?
For a Seattle storefront, a California job site, a daycare, or a residence, the answers are different. The objective is not to place the most cameras possible. It is to create dependable, business-grade coverage that deters incidents, documents activity, and remains useful when conditions are poor.
Start With the Events You Need to Capture
Camera coverage should begin with risk, not camera models. Walk the property as if you were investigating an incident. Identify how people, vehicles, staff, vendors, and visitors move through the site. Then identify the areas where theft, unauthorized access, disputes, safety issues, or property damage are most likely to happen.
For most properties, the highest-priority areas include primary entrances, secondary doors, loading areas, cash-handling locations, inventory rooms, driveways, parking areas, gates, and perimeter access points. A residential plan may prioritize front-door activity, side gates, rear access, garage doors, and package delivery areas. A construction site may need coverage at equipment storage zones, entry gates, material laydown areas, and trailer access.
Be specific about the evidence each view must provide. A wide overview of a parking lot can show vehicle movement, but it usually cannot read a plate from across the lot. A camera above a checkout can document a transaction, while a properly positioned facial-identification camera near the entrance can record who came in. One camera rarely does both jobs well.
Map How to Plan Camera Coverage by Zone
Divide the property into zones and assign a purpose to each camera. This approach prevents the common mistake of purchasing cameras first and trying to find places to install them later.
Entry and exit points
Every controlled entry should have a clear camera view of people approaching and passing through. Position cameras to capture faces at a practical angle, not only the tops of heads. A camera mounted too high above a doorway may prove that a person entered but provide weak identification.
At commercial sites, cover both the exterior approach and the interior side of important doors when possible. The exterior view captures someone before entry, while the interior view can document direction of travel, clothing, and activity after access. For facilities with multiple employees or public traffic, this two-view approach is often worth the additional equipment.
High-value and high-risk areas
Jewelry displays, register counters, smoke shop inventory, server rooms, stockrooms, tool cages, and medication storage require tighter coverage than general hallways. Install a focused camera that can see hands, transactions, and access points without being blocked by shelving, signs, or displays.
For daycares, coverage should support safety and accountability in entrances, pickup areas, hallways, playground access, and approved common spaces. Camera placement must also respect privacy expectations and applicable rules. Restrooms, changing areas, and other private spaces should never be recorded.
Parking lots, driveways, and vehicle access
Parking coverage needs a layered design. An overview camera helps track vehicle movement and activity throughout the area. A dedicated license plate recognition camera, placed at the correct height, distance, and angle, is needed when plate capture is a requirement. Do not assume a standard wide-angle camera can deliver reliable plates day and night.
Consider where vehicles slow down or stop. Gates, drive lanes, driveway entrances, and payment exits are often better plate-capture points than broad parking areas. Lighting, headlight glare, vehicle speed, and the direction of travel all affect results.
Perimeter and blind spots
Walk the exterior line of the building and look for side yards, rear doors, fence gaps, dumpsters, alleys, rooftop access, and areas hidden by landscaping. These are common paths for unauthorized entry because they are less visible from the street or front entrance.
A well-designed perimeter system uses overlapping views so an intruder does not disappear the moment they move behind a corner. Overlap does not mean every camera must see the same image. It means a person should move from one useful view into another without a major gap.
Match the Camera to the Job
Camera type matters because different lenses and features solve different coverage problems. Fixed bullet cameras are often a strong choice for long exterior runs, driveway approaches, and visible deterrence. Dome cameras are commonly used indoors or under covered exterior areas where a more discreet, tamper-resistant form factor is preferred.
PTZ cameras can actively follow activity across large spaces, such as parking lots or job sites, but they should not be the only camera covering a critical area. When the PTZ is pointed in one direction, it is not recording detail in another. Fixed cameras should protect key views continuously, while PTZ coverage adds operational flexibility.
Panorama and fisheye cameras can cover open areas with fewer mounting points, making them useful in lobbies, sales floors, or large rooms. Their wide view is valuable for situational awareness, though edge detail may not equal a dedicated fixed camera placed closer to the subject.
AI cameras can help filter events by people, vehicles, line crossing, loitering, and other defined behavior. This reduces wasted time reviewing motion alerts caused by shadows, rain, trees, or passing traffic. AI is most effective when detection zones and rules are configured for the site, not left at generic settings.
Check Height, Angle, Lighting, and Obstructions
A camera plan that looks correct on a floor map can fail after installation if physical conditions are ignored. Mounting height affects whether a camera captures a face, a plate, or only an overhead view. Lens angle affects distortion and usable detail. Sun position, reflections, streetlights, and nighttime glare can change the image dramatically.
Before finalizing placement, stand at the intended camera location and test the view. Look for awnings, trees, parked trucks, display racks, flags, and doors that can block the image. Consider seasonal changes as well. A clear view in winter can be obstructed by foliage in spring and summer.
Low-light performance deserves special attention. A dark alley or parking lot may need added lighting, carefully selected infrared coverage, or cameras designed to maintain color detail in low light. Infrared can be effective, but reflective surfaces, glass, and nearby walls can create glare. Cameras placed behind windows frequently perform poorly at night because infrared light reflects back into the lens.
Plan Recording, Network Capacity, and Retention
Coverage is only useful if the footage is available when needed. Calculate recording requirements based on camera count, resolution, frames per second, scene activity, retention period, and whether cameras record continuously or by event. A high-resolution system covering multiple busy entrances and parking areas can consume storage much faster than expected.
For many businesses, 30 days of retention is a practical starting point, but it depends on the operation, incident reporting timelines, and internal policy. High-risk sites may require longer retention. Homes may prioritize longer storage for fewer cameras. Make these decisions before selecting the recorder and hard drives, not after installation.
Network design also matters. Business-grade PoE switches, properly sized cabling, surge protection, and secure equipment locations support reliable operation. Wi-Fi cameras can be useful in limited situations, but fixed wired cameras are generally the better choice for critical exterior and commercial coverage because they avoid battery maintenance and reduce dependence on wireless signal conditions.
Design for Monitoring and Response
Decide who will receive alerts and what they are expected to do. A flood of generic motion notifications leads to ignored alerts. Configure event rules around meaningful activity, such as a person entering a closed area after hours, a vehicle crossing a gate line, or a door opening outside approved schedules.
Remote viewing should be simple enough for owners and managers to use during an active situation, but access should also be controlled. Create separate user permissions for administrators, managers, and staff. Change default passwords, use secure remote access practices, and document who has authority to review or export footage.
A system should also be maintained. Cameras need occasional lens cleaning, view checks, firmware review, recording verification, and adjustments after a remodel, new signage, landscaping changes, or a shift in operations. A camera that worked at installation can become ineffective over time without anyone noticing.
Use a Site Survey Before You Buy
A professional site survey turns broad goals into an installable plan. It confirms mounting surfaces, cable pathways, power availability, network locations, lighting challenges, distances, and equipment protection. It also identifies whether a camera needs a junction box, pole mount, weatherproof housing, wireless bridge, LTE or 5G connectivity, or another infrastructure component.
Tech Security USA helps property owners and facility teams build systems that are designed and installed correctly, from camera selection through installation coordination and same-day support. The right plan can combine fixed cameras, AI detection, plate capture, and remote access without paying for features that do not serve the property.
Before the first camera goes up, ask one final question at every location: if an incident happened here at 2 a.m., would this view show what matters? That standard keeps the design focused on usable evidence, reliable operation, and coverage that earns its place on the property.
Posted on GoogleTrustindex verifies that the original source of the review is Google. I visited the Tech Security USA orange to install security cameras for my home. I found it a very professional company, with high quality products that were made me impressed. I recommend it to anyone who are looking a professional security cameras company in onrange city of Orange County CA.Posted on GoogleTrustindex verifies that the original source of the review is Google. “Edit (this review is not “spam” which the owner claims it is and the story is absolutely real however it was about 2 years ago and if I wasn’t shy back then(9th grade) or I wish I had done/said something about my dad and I being taken advantage of as it was a scam (quoted at around $150 but after having to wait 3weeks instead of 3 days for the guy to charge us $300 for a cheap screen that no longer had a haptic button or working Touch ID along with many white pressure dots along the edges). Do not go here. If you look at most of their 5-star reviews, they are older than 7 years. I went here recently to fix my iPad Air (3rd gen). The problem was the screen's backlight wouldn't work, so it would just show a black image. The technician said he could get it done for around $150 and in 2-3 days he would call us (my dad and I). After a week of waiting, we decided to call but to no avail. We went to the place to check up on the work done, if any. We got there and the iPad was in the exact same spot as the day we left it there. The guy told us it would be ready in about 4 days, no later, and that he would call us. We never got the call, so we went back after about another 3 days of waiting for a call (2 weeks now). After waiting, we went back to the store for the iPad, and it appeared to us as if he had just gotten started by breaking the screen to replace it. After another week, we came back and he pulled it out from a drawer saying something along the lines of, "I was about to call you guys." The screen was working, but it was clearly a cheap screen that was ordered online, and the Touch ID didn’t work anymore. The button was replaced with a non-haptic one. There are many white dots along the edges of the screen that look as if someone pressed their thumb down too hard for too long. The guy said with all the "extra" work done to it, the new total would be $300. When my dad and I looked at each other, we knew that wasn’t right, but I watched my dad grab his wallet and pay. I wish I had said something because we were taken advantage of, and after a week, the iPad's screen isn’t functioning properly as it feels unresponsive.Posted on GoogleTrustindex verifies that the original source of the review is Google. Will somebody please tell the owner to stop responding? She’s only validating the bad reviews.Posted on GoogleTrustindex verifies that the original source of the review is Google. Little messy inside but brought an old Moto Z2 Play in to finalize my failed battery self install. Done when promised, phone looked as good as new and works fine. I'm happy.Posted on GoogleTrustindex verifies that the original source of the review is Google. Garbage screen quality do not come here the screen is more different then a regular apple screen they use low quality screens the whole screen shattered and has black lines throughout it after a tiny drop with a screen protector.Posted on GoogleTrustindex verifies that the original source of the review is Google. I needed a battery replacement for my Huawei p10, the engineer fixed it in a few days (he had to order the battery) and it was reasonable priced, very good, thank youPosted on GoogleTrustindex verifies that the original source of the review is Google. Great location and employees. Really came through when I needed help. Recommend this place to anyone.Posted on GoogleTrustindex verifies that the original source of the review is Google. My go to place for any laptop and iPhone repairs. Also very friendly and experienced guy James.
Resent Posts
How to Design Jobsite Surveillance That Works
21 October 2026
Surveillance System Maintenance Guide for Uptime
19 October 2026
Table of Contents